What could be more interesting that this - leaving aside the $100K video cameras, the season finale for 'House' has been shot on a camera that does Digital SLR with HD video capabilities. We will be able to see this in the episode that is to be aired on 17th May '10. I am pretty keen to see what it looks like. Given that the camera can be well under budget for budding and ethusiast photographers, this certainly is an amazing news!
Wednesday, April 28, 2010
'House' Season Finale shot on a Canon 5D Mark II !
What could be more interesting that this - leaving aside the $100K video cameras, the season finale for 'House' has been shot on a camera that does Digital SLR with HD video capabilities. We will be able to see this in the episode that is to be aired on 17th May '10. I am pretty keen to see what it looks like. Given that the camera can be well under budget for budding and ethusiast photographers, this certainly is an amazing news!The Afghan Girl - A Life Revealed

Steve McCurry had shot this in 1985 at a Pakistan Refugee Camp. And then he returned after 17 years to find that girl.
Here is the story behind the picture now.
http://ngm.nationalgeographic.com/2002/04/afghan-girl/index-text
Studio Lighting - The First Cut
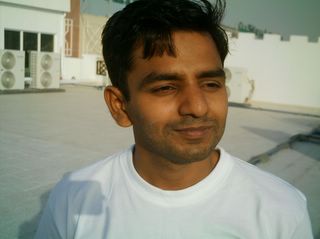
A couple of months ago – somewhere back in mid of November 09 – myself, Neeraj and Dalbir got together and decided to try our hands with some indoor lighting photography. Nobody of us had ventured into this earlier – mostly due to lack of lighting equipment. So definitely, the first thing was to setup some equipment. We started with buying the short length tube lights and a box (carton) for those. The box was covered in silver foil from inside for reflecting the light and fitted the tube lights inside that. It was finally covered with the translucent butter paper – and that made our first ever SoftBox – our main light. It was a very interesting experience shooting with this light. But pretty soon we realized that a single light wasn’t going to help much. So with an impromptu idea, we made another smaller one with a single fluorescent light bulb just as we started to shoot. This of course became our secondary light.
So with this make-shift equipment, a lot of time was spent taking some sample photographs and understanding how the light is impacting the model. (One of our friends – Rolf Shroff – had volunteered to be a model here). Through the overall experience, there were a couple of very interesting things that we learnt about lighting for portrait photography –
1. When the main light is used directly in front of the subject, most of the times, the image tends to be very flat. We figured that shadows play a very interesting role in defining the face or emphasizing certain features. The way we use lights and shadows also dramatically changes the mood of the image.
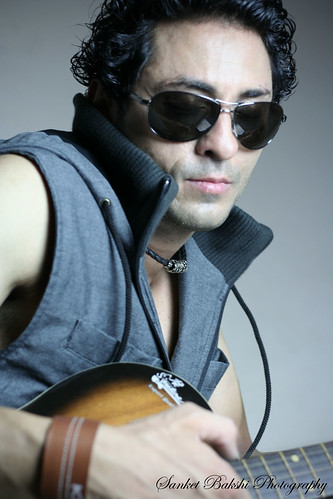 2. So now once the main light is moved slightly to the either side, naturally, there are some shadows. Depending on the mood of the image, you would probably want the shadows to be mellowed down. That’s where our smaller light came handy – to cancel the shadows. Making the shadows less harsh changes a whole lot of things that the image talks about itself. I think the mood suddenly changes to a lot more mellow and relaxing. Club it with a diffuser filter and some warm tones to get some of those cordial warm tones. Of course these are some things that can be touched upon during the post-processing as well.
3. Accentuating the prominent face features – such as the face cut, nose or eyes can be really easy once you start to get a hang of how the lights work. We tried some experiments with holding the light above Rolf’s head at an angle to accentuate face cut and it gave some really good results. The key point is to understand what features need to be emphasized for a particular shot and then to position the lights accordingly.
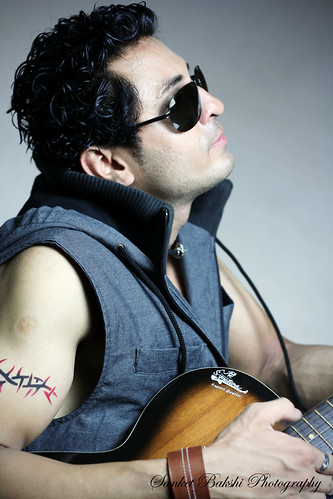 Retrospectively, looking at these images that I got, I think it was a decent job for first timers handling the light. However, for my images, I think I could’ve done better at using the in-camera white balance. The pictures right now very cool hues. After looking at them again with a fresh mind, these cool hues somehow do not work for me. Probably even a simple step like setting the in-camera white balance to “fluorescent” would’ve given the warm hues that would’ve taken off the “artificial lighting” feeling that is currently prominent. Secondly, probably the biggest mistake was that I dint shoot raw for this shoot. Shooting raw allows you to define the attributes such as color temperature, contrast, saturation etc. This is something that I kept in mind for all the future “studio” shots that I did with this make-shift equipment so far.
These are some of the basics of lighting that we learnt hands-on during this session. Click here to see some of the good ones that I got during this shoot. Definitely a very interesting way to spend a weekend morning!
So with this make-shift equipment, a lot of time was spent taking some sample photographs and understanding how the light is impacting the model. (One of our friends – Rolf Shroff – had volunteered to be a model here). Through the overall experience, there were a couple of very interesting things that we learnt about lighting for portrait photography –
1. When the main light is used directly in front of the subject, most of the times, the image tends to be very flat. We figured that shadows play a very interesting role in defining the face or emphasizing certain features. The way we use lights and shadows also dramatically changes the mood of the image.
3. Accentuating the prominent face features – such as the face cut, nose or eyes can be really easy once you start to get a hang of how the lights work. We tried some experiments with holding the light above Rolf’s head at an angle to accentuate face cut and it gave some really good results. The key point is to understand what features need to be emphasized for a particular shot and then to position the lights accordingly.
Retrospectively, looking at these images that I got, I think it was a decent job for first timers handling the light. However, for my images, I think I could’ve done better at using the in-camera white balance. The pictures right now very cool hues. After looking at them again with a fresh mind, these cool hues somehow do not work for me. Probably even a simple step like setting the in-camera white balance to “fluorescent” would’ve given the warm hues that would’ve taken off the “artificial lighting” feeling that is currently prominent. Secondly, probably the biggest mistake was that I dint shoot raw for this shoot. Shooting raw allows you to define the attributes such as color temperature, contrast, saturation etc. This is something that I kept in mind for all the future “studio” shots that I did with this make-shift equipment so far. These are some of the basics of lighting that we learnt hands-on during this session. Click here to see some of the good ones that I got during this shoot. Definitely a very interesting way to spend a weekend morning!
Monday, April 26, 2010
My new Photography Blog
I've been wanting to do this for a long time now... Whenever I take my camera in my hand or play around with the pictures that I have taken, I realize that every time I learn a thing or two that just comes as a realization. Each of these instances has that "Eureka" feeling that gets me doing better and better at photography each time. I just love that whole experience.
What I really wanted to do is get these things out to all of you so that we can talk about them discuss them in this forum and in turn I can get better and better at doing these. I am sure there will be a lot of such things that I will get to learn from each of you as well in the process of doing this.
All for initiating this collaboration - and keeping on that learning experience that helps us get better. To get the ball rolling - which is the most difficult tasks to do - I will be starting with some of the previous photoshoots that I had done.
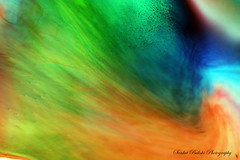
So be sure to check back this space... I hope the things that come along will keep you interested. And oh yes - here is a visual treat to start with :)
--Sanket
What I really wanted to do is get these things out to all of you so that we can talk about them discuss them in this forum and in turn I can get better and better at doing these. I am sure there will be a lot of such things that I will get to learn from each of you as well in the process of doing this.
All for initiating this collaboration - and keeping on that learning experience that helps us get better. To get the ball rolling - which is the most difficult tasks to do - I will be starting with some of the previous photoshoots that I had done.
So be sure to check back this space... I hope the things that come along will keep you interested. And oh yes - here is a visual treat to start with :)
--Sanket
Subscribe to:
Posts (Atom)